
How I Created an Indoor Edible Garden (Even Without a Backyard)
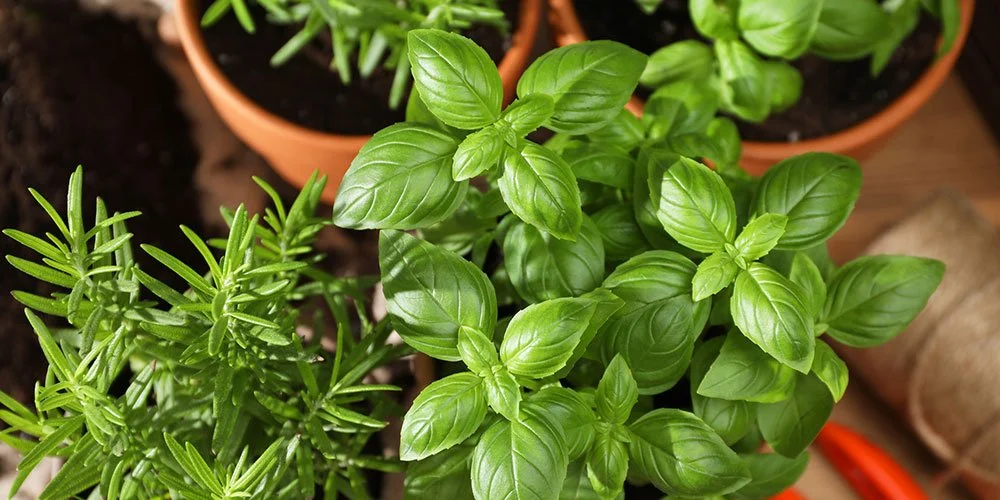
You don't need a backyard, a greenhouse, or a green thumb to grow your own food.
For years, I had an idea in the back of my mind: I wanted a garden.
Not a huge vegetable garden with rows and rows of plants. I simply wanted to walk into my kitchen and snip some fresh herbs for dinner, pick a handful of lettuce for lunch, or watch a little tomato ripen on the vine.
There was just one problem.
I don't have a backyard.
And somehow, every time I thought about starting an indoor garden, it felt incredibly complicated. There were grow lights, seed starting, pots, soil, watering schedules, fertilizer, figuring out which plants needed what...and honestly, I kept putting it off.
I assumed that growing food indoors would be difficult and require a lot of equipment and knowledge.
It turns out, it really doesn't have to be.
Once I broke the process down into small steps, I realized that creating an indoor edible garden was actually quite simple. And now one of my favorite things is walking into my kitchen and seeing all of these little plants growing on a shelf in my home.
I grow herbs, several varieties of leafy lettuce, and small tomatoes—and I can actually harvest them and add them to our meals.
It's incredibly satisfying.
And if you've ever thought, I would love to grow my own food, but I don't have a yard, I hope this gives you the little push you need to try it.
You Don't Need a Backyard to Grow Food
One of the things I love most about this project is that it completely changed the way I thought about having a garden.
A garden doesn't have to mean a backyard.
You can grow food in an apartment, on a kitchen counter, in a sunny window, on a balcony, or on a small shelving unit.
You don't even necessarily need a particularly sunny room.
The biggest game changer for me was grow lights.
Once I realized that I could create the right growing conditions indoors with a relatively small amount of equipment, the whole project suddenly seemed much more approachable.
My indoor garden is essentially a little growing station that I created on a shelving unit. It doesn't take up a huge amount of space, and because I chose plants that are well suited to containers, I can move things around as they grow.
And there's something very lovely about having a garden right inside your home.
My Indoor Garden Setup
Before getting started, I gathered everything I needed. I wanted to keep the setup simple and relatively inexpensive, especially because I wasn't sure how successful my first attempt would be.
Here is what I used:
For starting seeds
Indoor hydroponic growing system
Hydroponic pod refills
Organic herb seeds
Organic lettuce seeds
Organic tomato seeds
For transplanting seedlings
3.5-inch nursery pots
IKEA VITTSJÖ shelf unit
Barrina grow lights
Surge protector/power strip
For growing the plants
White plastic pots in various sizes
Tomato planter with trellis
Pot grow lights
Clip fan
Plant food
For dealing with pests
Sticky traps
BTI treatment
You certainly don't have to use these exact products, but I've included the equipment I used because I know how helpful it can be when you're starting something new to simply have a shopping list to follow.
Step 1: Start Your Seeds
This was the part I was most intimidated by.
I had visions of carefully planting dozens of tiny seeds in little pots, trying to figure out how much water they needed, wondering whether they were getting enough light, and waiting forever to see whether anything would actually grow.
Instead, I started my seeds in an indoor hydroponic growing system.
This ended up being one of my favorite parts of the process.
The growing system provides water and light in a contained little environment, and the built-in grow lights made it much easier to give the seedlings the light they needed during those first stages of growth.
I used hydroponic pod refills and planted:
Herbs
Lettuce
Tomatoes
A few seed-starting tips
When you're starting seeds indoors, resist the urge to plant everything you own!
It's very easy to get excited and suddenly have 30 tiny seedlings on your hands.
For your first garden, I recommend choosing a few things you actually eat regularly.
Herbs and leafy greens are particularly rewarding because you can begin harvesting them relatively quickly.
Tomatoes take longer and require more room, but watching a tomato plant grow indoors is incredibly fun.
Follow the planting depth and germination instructions for the particular seeds you're using. Different seeds have different requirements.
And most importantly, don't let the growing medium dry out during germination.
At the same time, don't assume that more water is better. This is a lesson I learned later!
Step 2: Wait for Your Little Seedlings
This is the fun part.
Suddenly, you're checking your garden every morning.
A tiny green sprout appears.
Then another.
Then suddenly there are actual little plants growing in front of you.
This is one of the reasons I loved using the growing system for the beginning stages. The grow lights meant I didn't have to worry as much about whether my seedlings were receiving enough natural sunlight.
Once the seedlings became established and were large enough to transplant, it was time to move them into their own little pots.
Step 3: Move Your Seedlings Into Small Pots
Once the seedlings were ready, I transferred them into 3.5-inch nursery pots.
This is where the garden started to feel like an actual garden.
Instead of everything growing together in the seed-starting system, each little plant had its own container.
When transplanting, be gentle with the roots. I found it helpful to handle the seedlings by their leaves or the surrounding growing medium rather than pulling on the delicate stem.
Make sure your pots have drainage holes.
This is extremely important for indoor gardening.
Water needs somewhere to go. A pot without drainage can leave the roots sitting in water, which can lead to root problems and other issues.
Step 4: Create Your Indoor Garden Shelf
This was probably the part of the project I was most excited about.
I wanted my garden to look nice enough to actually live in my home—not like a collection of random gardening equipment sitting around the kitchen.
I chose an IKEA VITTSJÖ shelf unit because it was simple, lightweight, and had a clean look that worked with my space.
Then I added Barrina grow lights underneath the shelves.
And honestly?
I was surprised by how easy this was.
The lights simply stick onto the shelving unit, so there wasn't a complicated installation process. Once they were attached, I plugged everything into a surge protector/power strip and had a dedicated little indoor growing station.
This is one of my biggest tips if you're intimidated by indoor gardening:
Think vertically.
You don't need a huge amount of floor space.
A shelving unit allows you to create several growing levels in a relatively small footprint.
And because the plants are right there in your home, it becomes part of your everyday environment.
Step 5: Give Your Plants the Light They Need
If there's one thing I would prioritize for an indoor edible garden, it's adequate light.
Even if you have beautiful sunny windows, the amount and intensity of light coming through a window may not be enough for every type of edible plant.
That's where grow lights become so useful.
I used grow lights on my shelving unit and later added individual pot grow lights as some of the plants got larger.
The exact amount of light your plants need will depend on the plant variety and the particular grow light you're using, so follow the manufacturer's instructions rather than assuming every plant needs the same schedule.
I also found it helpful to rotate plants when necessary so that everything had adequate space and light.
Step 6: Give Your Plants Room to Grow
This is where your tiny seedlings start turning into real plants.
As the roots and foliage develop, they'll eventually outgrow their little nursery pots.
When that happens, move them into larger containers.
I used white plastic pots in several different sizes, depending on the plant.
For tomatoes, I used a tomato planter with a trellis, because tomato plants need additional room and support as they grow.
One of the things I learned through this process is that plants don't necessarily need to be moved into their largest container immediately.
Think of it as giving them a little more room as they grow.
A plant that is appropriately sized for its container is much easier to manage indoors.
Step 7: Add Airflow
Here's another thing I didn't initially think much about: airflow.
Indoor gardens can benefit from some gentle air circulation.
I added a small clip fan to my setup, which helped keep the air moving around the plants.
You don't want to blast your plants with a strong stream of air. Gentle circulation is the goal.
Good airflow can also help create a healthier growing environment, particularly when you have a lot of plants growing close together.
Step 8: Feed Your Plants
Once your plants are established, they'll need nutrients to continue growing.
Because you're growing in containers, the plants don't have access to the nutrients they might naturally find in a larger outdoor garden.
I used plant food as part of my indoor gardening routine.
Always follow the directions on your particular plant food. More isn't necessarily better, and over-fertilizing can cause problems.
I found that having a simple routine worked best: check the plants, check the soil, water when needed, and feed according to the product instructions.
You don't need to make caring for your garden complicated.
Step 9: Don't Overwater!
And now we get to the mistake I made.
I overwatered my plants.
And eventually, I had fungus gnats.
If you've ever seen those tiny little flies hovering around your houseplants, you know what I'm talking about.
The good news is that this didn't mean my garden was ruined.
I treated the problem with BTI and sticky traps, and eventually cleared it up.
The biggest lesson for me was simply to pay more attention to the moisture level of the soil.
Indoor gardening doesn't mean your plants need water every day.
The amount of water they need will depend on the plant, pot size, growing medium, temperature, humidity, airflow, and light.
Before watering, check the soil rather than watering automatically on a schedule.
And make sure your containers have drainage.
My indoor pest-fighting setup
For fungus gnats, I used:
BTI treatment: A biological control commonly used to target fungus gnat larvae in the growing medium.
Sticky traps: These catch the adult gnats and help you monitor whether you're still dealing with an infestation.
The combination worked well for me, along with correcting the overwatering that caused the problem in the first place.
And honestly, I think it's worth mentioning this because gardening isn't always perfect.
Sometimes you get pests.
Sometimes a plant doesn't make it.
Sometimes you overwater.
That's gardening.
You learn as you go.
Step 10: Harvest!
This is the part that makes all of it worth it.
Eventually, the little seedlings become actual edible plants.
I started harvesting herbs and leafy greens for meals, and watching the tomato plants develop fruit was especially exciting.
There's something strangely satisfying about walking into your kitchen, clipping a handful of herbs, and putting them directly into whatever you're cooking.
It's a tiny luxury.
And it changes the way you think about food.
Instead of herbs simply coming from the grocery store, you begin to notice how they grow, how much light they need, how quickly they develop, and how good they smell when you brush against them.
Even harvesting a small amount feels special.
What I Love About Having an Indoor Garden
I think the biggest surprise has been that this garden has become more than a way to grow food.
It's become part of my daily life.
I check on the plants in the morning. I notice new growth. I water them. I move things around. I harvest herbs for dinner.
It's a very small ritual, but I find it incredibly grounding.
We're so used to food being packaged and transported and placed on grocery store shelves that there's something wonderful about reconnecting with the process—even on a very small scale.
And you don't need to grow enough food to feed your family for it to be worthwhile.
A handful of basil counts.
A few leaves of lettuce count.
A little tomato picked directly from the plant counts.
You are still growing something.
If You've Been Putting Off Starting a Garden...
I think this is the biggest thing I want to share.
Don't wait until you have the perfect space.
I waited for years because I thought I needed a backyard.
I thought I needed to know more.
I thought I needed a complicated setup.
I thought gardening was going to be difficult.
But once I broke it down into steps, it became surprisingly manageable.
Start with a few seeds.
Get a small growing system.
Give your seedlings good light.
Move them into pots.
Create a simple shelf.
Water them—but don't overwater them!
Give them nutrients, airflow, and enough light.
And then wait.
You don't have to become an expert gardener overnight.
You just have to start.
My Indoor Garden Shopping List
If you'd like to recreate my setup, here is everything I used:
Seed Starting
Indoor Garden Hydroponics Growing System
Hydroponic Pod Kit Refills
Organic Herb Seeds
Organic Lettuce Seeds
Organic Tomato Seeds
Moving Seedlings to Small Pots
3.5-inch Seed Starting Nursery Pots
Indoor Garden Shelf
IKEA VITTSJÖ Shelf Unit
Barrina Grow Lights
Surge Protector Power Strip
Growing & Harvesting
White Plastic Pots in Various Sizes
Tomato Planter with Trellis
Pot Grow Lights
Clip Fan
Plant Food
Pest Control
Sticky Fly Traps
BTI Treatment
This post contains products I personally used as part of my indoor garden setup. Product links may be affiliate links, which means I may earn a small commission if you purchase through them, at no additional cost to you.
A Little Garden, Right at Home
I still love the idea of having a big outdoor garden someday.
But I've realized that I don't have to wait for that day.
I can grow something right now.
I can grow it in my kitchen, on a shelf, underneath a grow light.
And maybe that's the real lesson of this little garden: you don't need the perfect circumstances to create something you love.
You can start with the space you have.
A few pots.
A few seeds.
A little light.
And before long, you might find yourself walking into your kitchen and picking dinner from your very own garden.
And that feels pretty wonderful.
Ready to grow your own? Start small, keep it simple, and let your garden grow with you.
Seed Starting
Indoor Garden Hydroponics Growing System
Organic Tomato Seeds
Move Seedlings to Small Pots
Seed Starting 3.5 in Nursery Pots
Ikea VITTSJÖ Shelf Unit, white/glass
Clear Plastic Trays
Watering Pot
Move To Bigger Pots
White Plastic Pots in Various Sizes
Plant Food
Larger Watering Pot
Dealing with Pests
BTI Treatment